Installing Indoor Optical Fiber Starry Ceilings for Home Theaters and Hospitality Projects


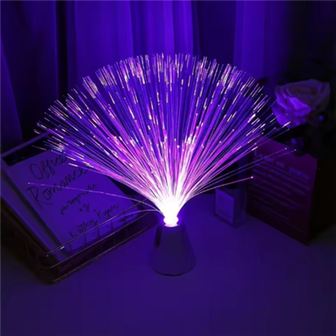
System Components: How Optical Fiber Ceiling Lighting Works
Unlike conventional LED spot lights, an optical fiber starry ceiling system separates the light source from the output terminal, offering 100% electrical safety at the ceiling surface:
- High-Purity PMMA Fiber Bundles: Non-conductive plastic optical fibers carry light pulses from the light source engine to the ceiling end points. Combining different fiber diameters (0.75mm, 1.0mm, and 1.5mm) creates natural star magnitude variation with realistic visual depth.
- Smart LED Light Source Engine: Equipped with high-power RGBW LEDs, dynamic twinkle wheels, and wireless controls (RF / Bluetooth App / DMX512), transmitting vibrant colors and shooting star effects into the fiber bundles.
Step-by-Step Installation Guide for Indoor Starry Ceilings
To achieve an immaculate, high-density optical starfield effect, follow this standard engineering installation workflow:
Step 1: Ceiling Panel Preparation & Drilling
- Prepare acoustic modular panels (or drywall ceiling sections).
- Mark the star density layout on the back of the panels (recommended density: 30 to 50 star points per square meter).
- Using a fine PCB drill bit (0.8mm to 1.6mm matching your fiber diameters), drill holes through the back of the panel at marked positions.
Step 2: Fiber Strand Threading & Fixing
- Thread the individual PMMA plastic optical fiber strands through the drilled holes from the back of the ceiling panel until 3 to 5 cm of fiber protrudes from the finished front side.
- Apply a dot of non-corrosive clear adhesive (such as silicone or neutral curing gel) on the back of each hole to lock the optical fibers firmly in place. Allow the glue to cure completely.
Step 3: Ceiling Mounting & Engine Connection
- Mount the fiber-threaded ceiling panels onto the aluminum support frame.
- Gather all fiber strand tail ends from the back and insert the bundle head into the optical port connector of the LED light engine. Secure the connector lock mechanism tightly to minimize coupling light loss.
- Place the light engine in a well-ventilated, easy-to-access area (such as an access hatch or closet) for convenient maintenance.
Step 4: Trimming and Optical End Polishing
- Once the ceiling panels are permanently installed, use sharp hot-blade clippers or flush cutters to trim the protruding fiber ends on the front side, leaving approximately 1mm to 2mm flush with the surface.
- Power on the RGBW light engine to test light transmission, color uniformity, and twinkle speed settings across the room.


Key Advantages for Interior Lighting Projects
- Zero Electrical Risk & Heat: No electrical current runs through the fibers, making them totally safe for wet or thermal ceiling spaces.
- Ultra-Long Lifespan: PMMA fibers retain optical clarity for over 10 years without aging or color degradation.
- Flexible Customization: Fiber lengths and bundle counts can be tailored precisely to match any room dimensions or architectural drawing.
Looking for high-purity PMMA optical fiber bundles or customized light engine kits for your ceiling lighting projects? Contact our engineering team today to receive a complete solution catalog!
Jiangsu TX Plastic Optical Fibers Co.,LTD
Address: No 9, Yidong Rd, Dantu District, Zhenjiang City, Jiangsu Province, China
Website: http://www.fibretx.com
Please send me an inquiry for more information if you have any interests and demends.
Contact person
Freya Shao
Phone Number
+86 19505282863 (WhatsApp & Wechat)
yll@txpof.com